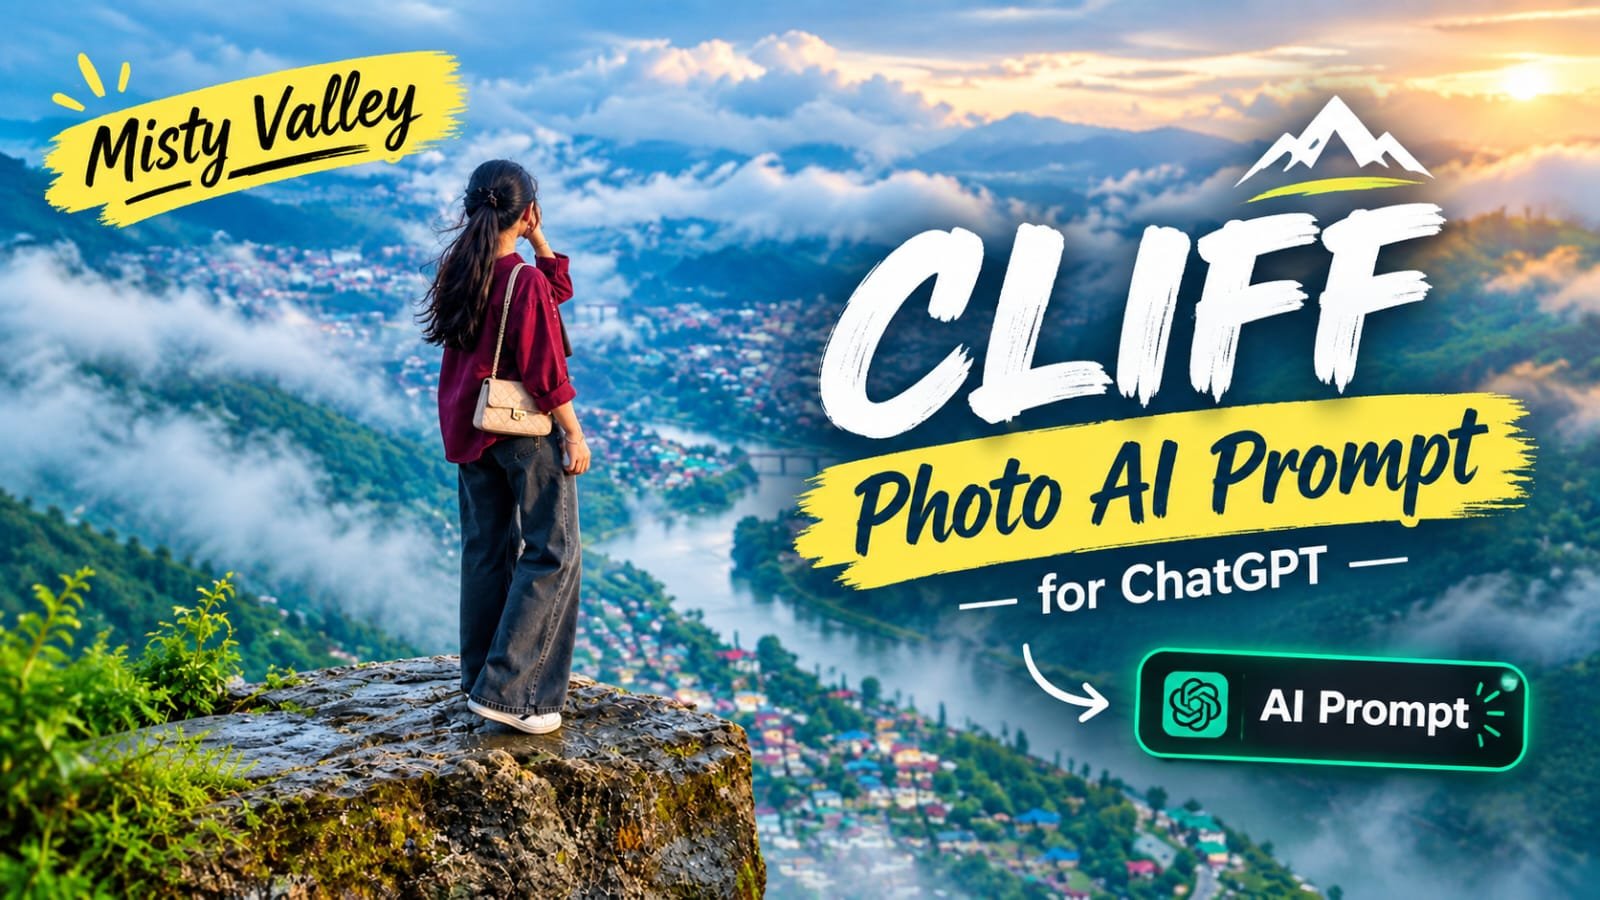
This trending cliff-edge photo — jahan aap ek rocky ledge par khade hain aur neeche ek fog se dhaki hui river valley town dikhti hai — is currently going viral on Instagram Reels aur Posts. Is article mein hum step-by-step dekhenge ki ChatGPT (GPT-4o Image) mein yeh exact aesthetic kaise banayein, bina kisi photoshoot ya drone ke.
Yeh Trend Kya Hai
Ye photo trend basically ek “God’s eye view” cliff shot hai.
Subject rocky cliff edge par khada hota hai, peeth camera ki taraf.
Neeche ek foggy river valley hoti hai jisme small colorful houses aur ek winding river dikhti hai.
Chaaron taraf thick clouds/mist hote hain jo depth aur drama create karte hain.
Yeh look Himachal ya Uttarakhand ke hill stations jaisa lagta hai — bahut cinematic aur peaceful feel deta hai.
Reels par log apni khud ki photo upload karke isko is misty valley scene mein blend kara rahe hain.
Kaunsi Photo Use Karein
Best result ke liye ek clear, well-lit full-body ya back-pose photo choose karein.
Standing pose sabse achha kaam karta hai — jaise haath peeche ya pocket mein.
Face visible na bhi ho (back angle) to bhi trend authentic lagta hai.
Plain background wali photo best hai taaki AI aasani se subject ko naye scene mein place kar sake.
ChatGPT Mein Step-by-Step Kaise Banayein
Step 1: ChatGPT app ya web par apni photo upload karein.
Step 2: Neeche diya gaya prompt copy karke paste karein.
Step 3: Apni pose (standing/sitting), outfit color, aur time of day (morning fog / golden hour) ke hisaab se prompt customize karein.
Step 4: Generate karein aur 2-3 variations try karein taaki best composition mile.
Step 5: Final image ko thoda sharpen ya color-grade karke Instagram par post karein.
Prompt
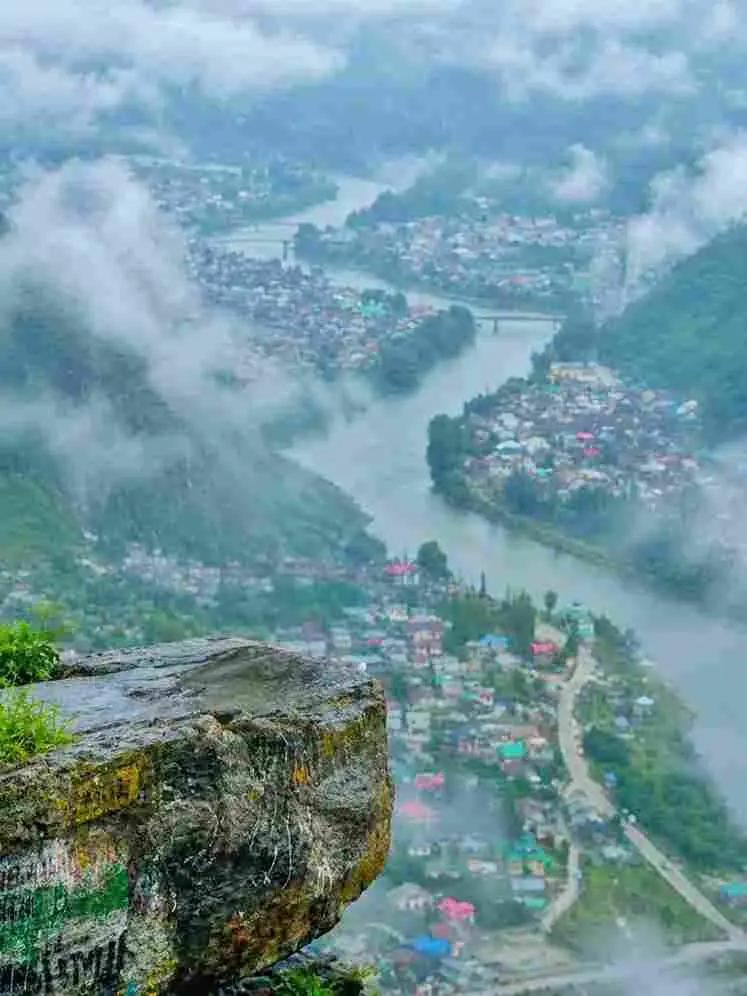
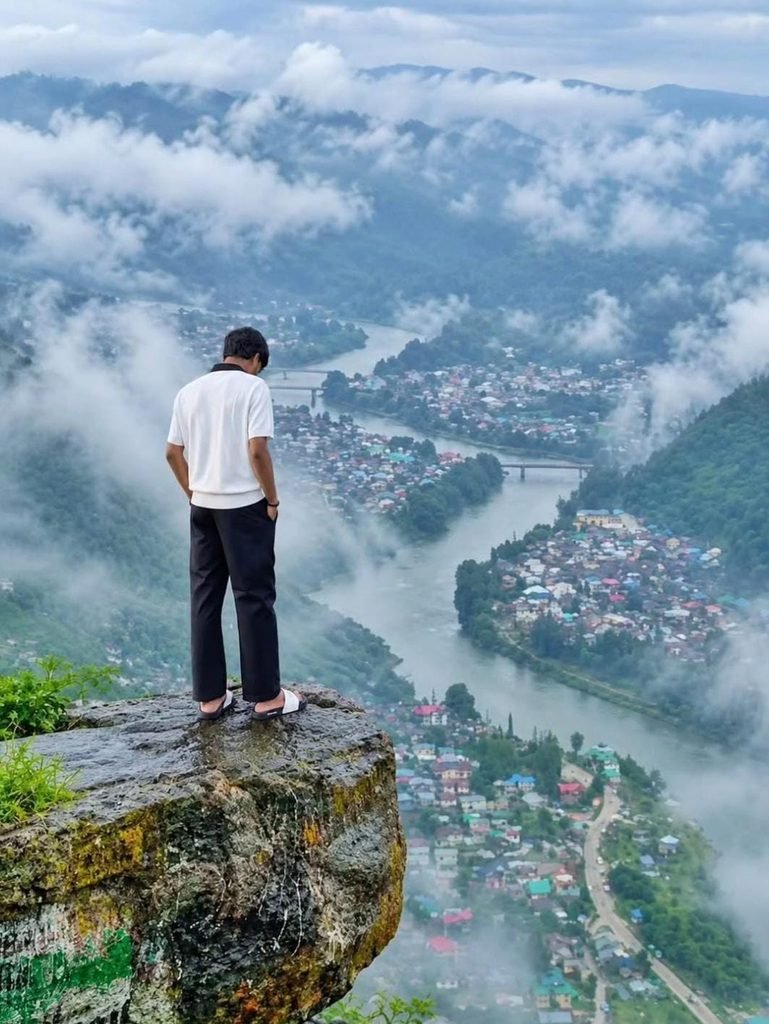
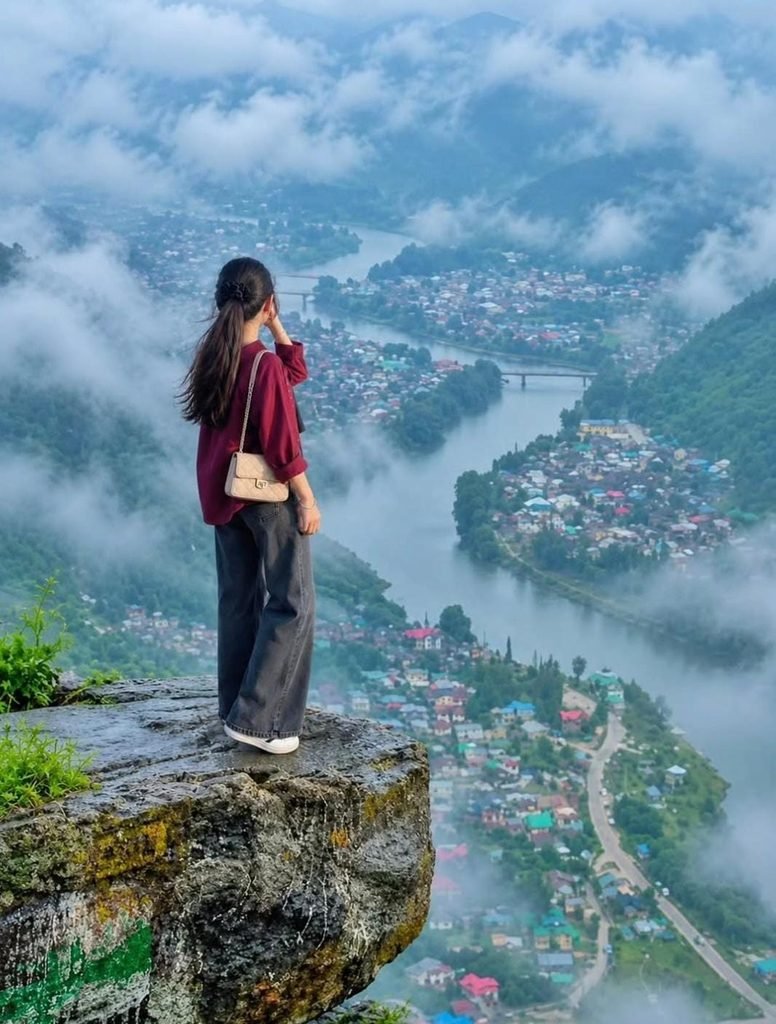
Place this person in the second photo in a realistic manner and adjust them to match the second photo; do not change anything else. Keep the background exactly as it is-do not alter it at all-and do not change the face or body size. Enhance the image to 8K quality and set the aspect ratio to 3:4. Background not change and fog add 20% and Background size bada doAI Tools Comparison
| AI Tool | Kaise Use Hoga | Best For |
|---|---|---|
| ChatGPT (GPT-4o Image) | Photo upload + text prompt se scene blend | Realistic misty valley background |
| Google Gemini | Similar image-to-image blending | Quick alternate variations |
| Google Flow | Static photo ko short cinematic video mein convert | Reels ke liye motion add karna |
| Midjourney | Prompt-only, reference image se style match | High-detail landscape texture |
| Leonardo AI | Image-to-image with style presets | Moody/cinematic color grading |
| CapCut / VN | Final video edit, text overlay, music sync | Reel banane ke liye |
Pro Tips
Fog aur mist ka description prompt mein detailed rakhein — “thick morning fog,” “low hanging clouds” jaise words better realism dete hain.
Subject ki clothing color aisi choose karein jo fog ke muted tones se contrast kare (white, maroon, black achha kaam karte hain).
Vertical (9:16) aspect ratio use karein taaki Reels/Stories ke liye perfect crop mile.
Ek hi photo ke 2-3 versions banayein (different lighting) aur carousel post karein — jaisa creative_editor_05 ne kiya.
FAQs
Q1: Kya yeh photo real location jaisi lagti hai?
Haan, agar prompt mein specific details (river bend, colorful rooftops, tree line) add karein to yeh Himachal/Uttarakhand ke real hill stations jaisi realistic lagti hai.
Q2: Iske liye kaunsa camera angle best hai apni original photo mein?
Back-facing ya three-quarter standing pose best hai kyunki isse AI easily body ko naye background mein fit kar deta hai.
Q3: Kya couple bhi ye trend try kar sakte hain?
Bilkul, do alag photos upload karke same misty valley scene mein dono ko place kiya ja sakta hai — jaisa is trend ke dono versions mein dikhaya gaya hai.
Q4: Video version kaise banayein?
Photo ko Google Flow ya Gemini mein daal kar halka camera pan ya cloud movement add karein, phir CapCut mein music ke saath edit karein.
Aise hi trending AI photo & video prompts sabse pehle paane ke liye humara Telegram channel join karein!